Lab 0 - Setup the Labs
In this very first lab we will get everything setup with your very first firmware.
This is an Amazon FreeRTOS workshop, and our goal is to connect our device to the cloud. For this, we will start by creating our first AWS IoT Thing, create its unique Certificate and attach an IoT Policy to it.
Create MyThing
First we need to create our AWS IoT Thing. For the purpose of this Lab, we will call our Thing: MyThing but you are free to name it whatever you want.
Creating a Thing requires 3 main steps:
- Create a thing for the device in IoT Core
- Create a certificate and attach it to the thing
- Create a Policy and attach it to the certificate
1. Create Thing
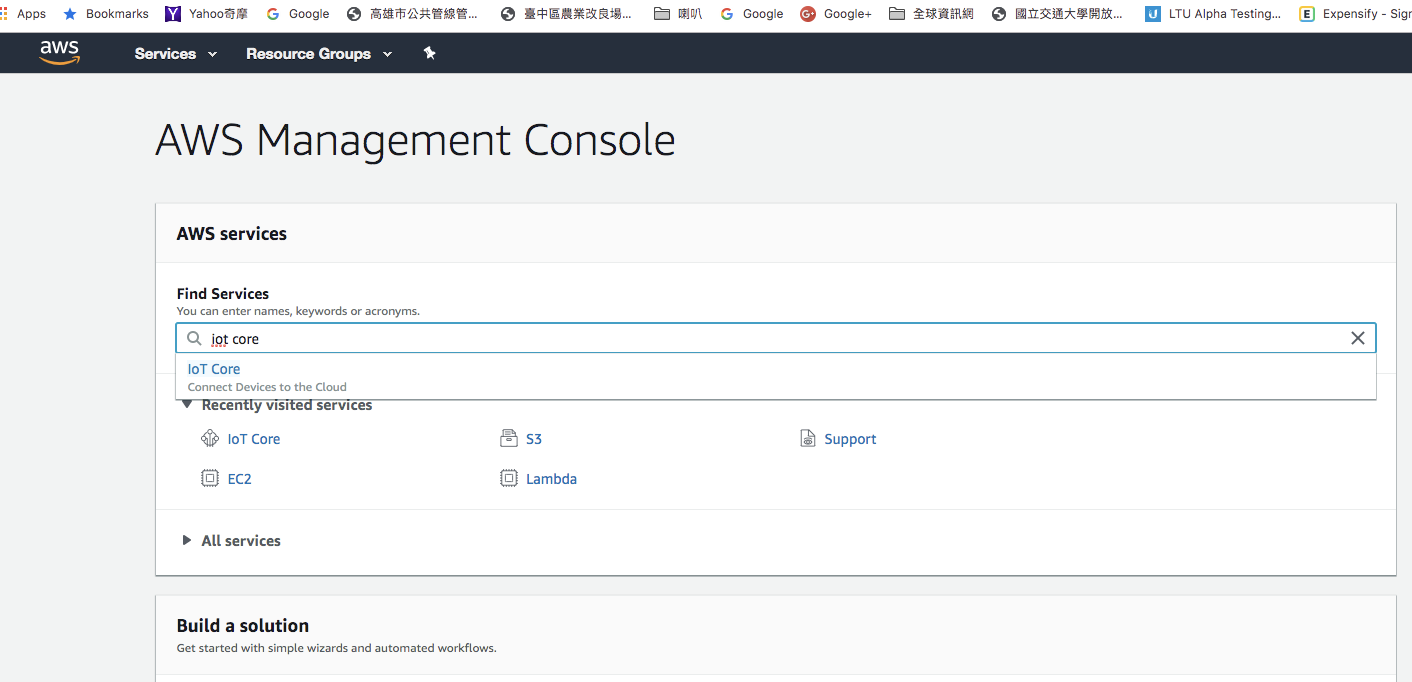
Navigate to IoT Core to enter the AWS IoT service
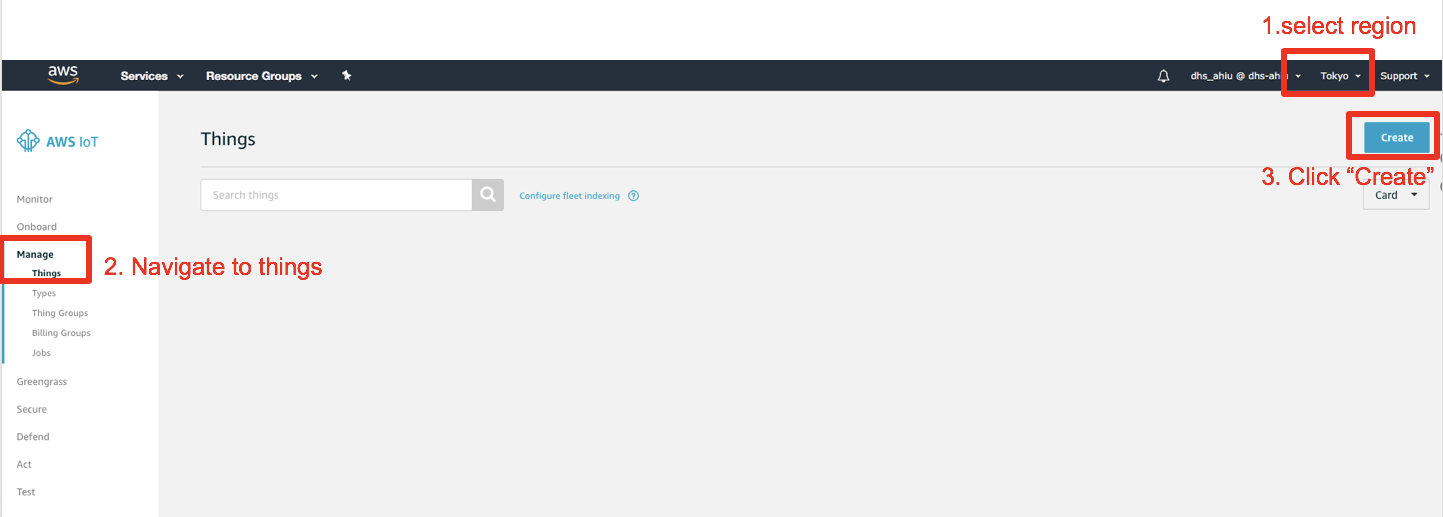
Follow the below 3 steps to register your thing:
- Make sure to select the us-east-1 region
- Navigate to Manage → Things
- Click Create to start the creation and registration of your device
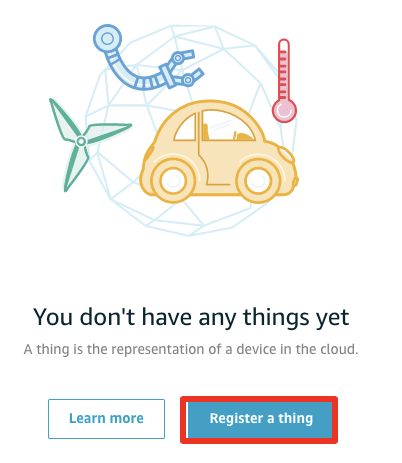
If this is the very first time you create a device, the following page will appear, please click Register a thing to get started
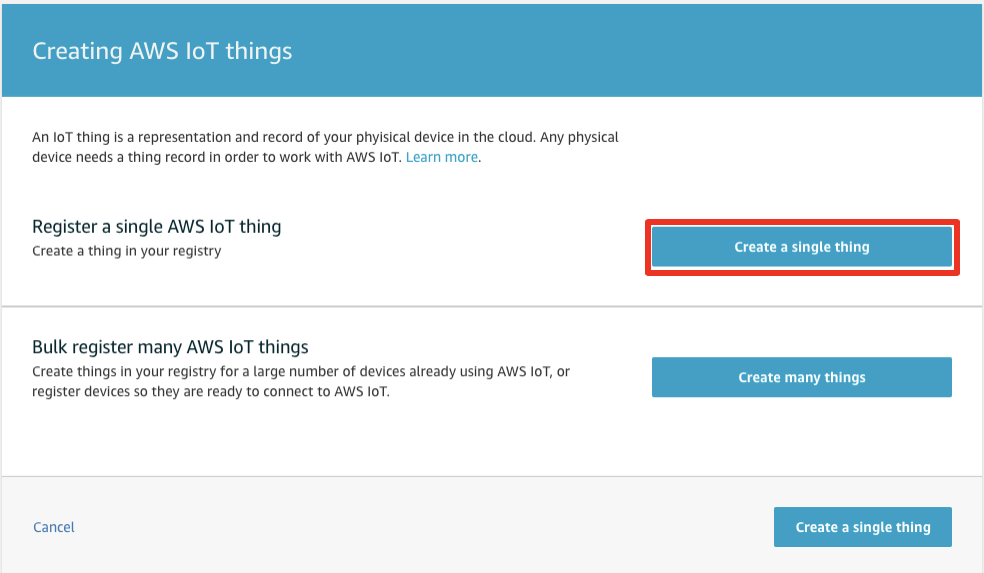
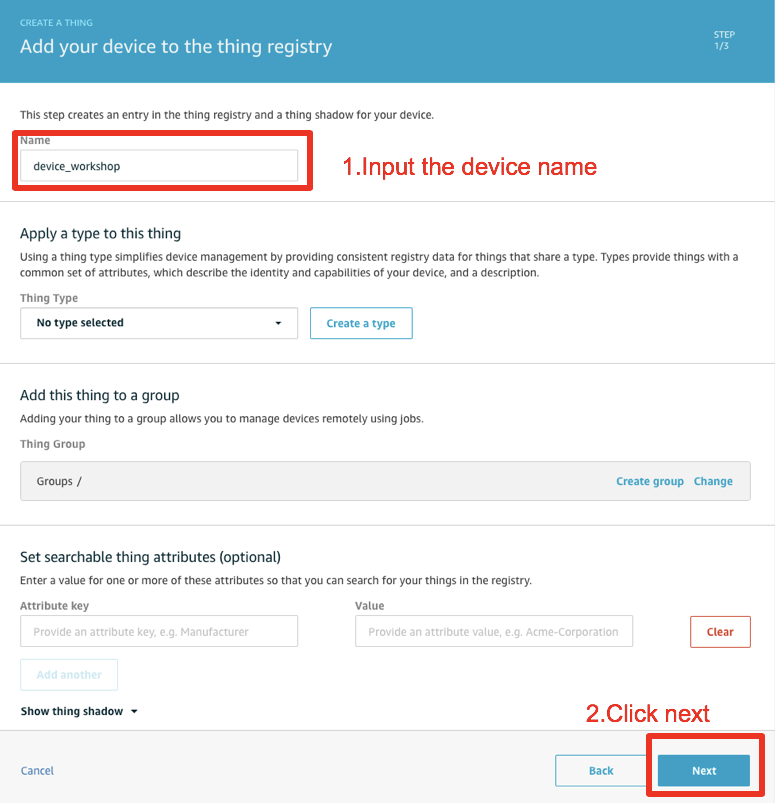
In Creating AWS IoT Things page, choose Create a single thing
Input a Thing name of your choice and click Next
Note 1: In the below screenshot, device_workshop is our thing name. You can choose any thing name you want. For the remainder of the labs we will refer to the Thing as MyThing
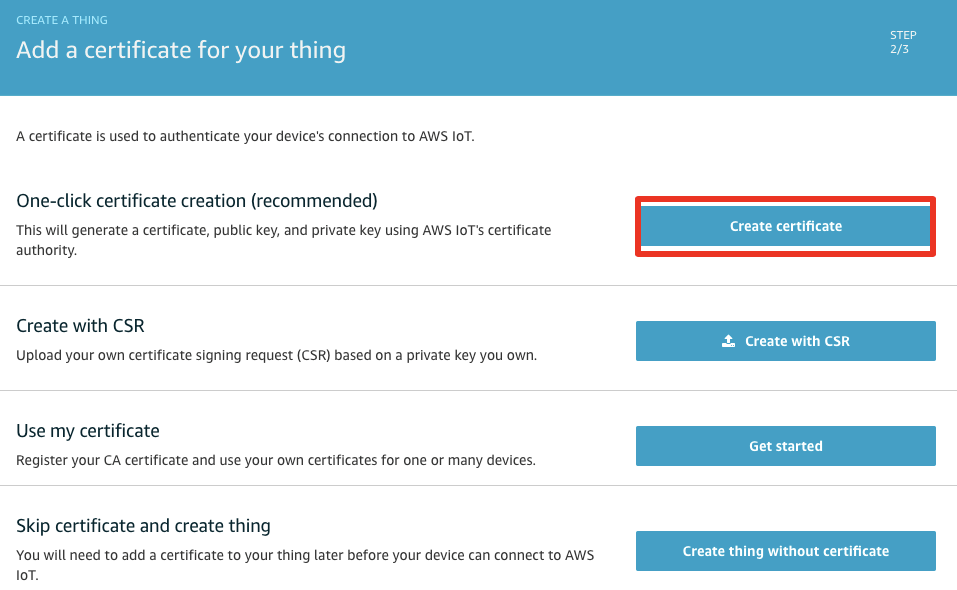
2. Create a certificate and attach it to the thing
Choose the recommended One-click certificate creation
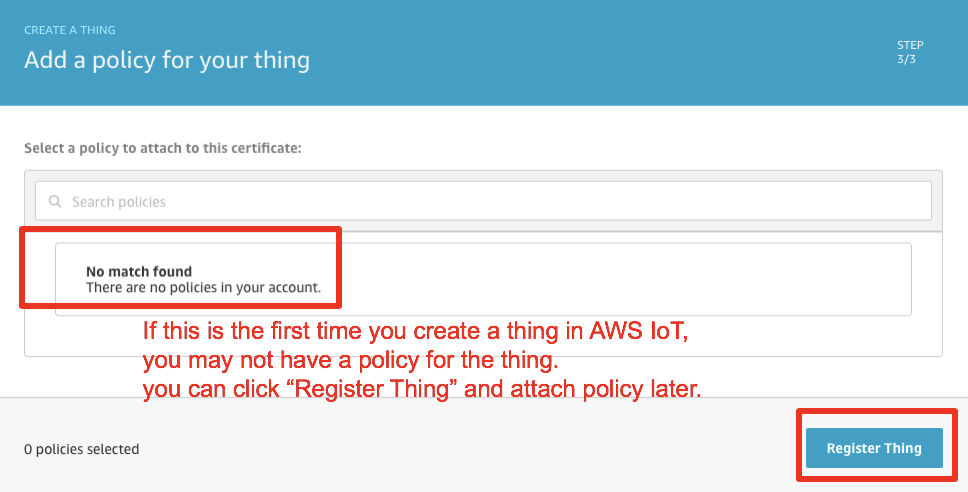
If this is the first time you create a thing in AWS IoT, you may not already have IoT policies defined. You can click Register Thing and we’ll attach a policy later.
Note 2: Make sure you activate your certificate, or else your certificate will be created, but your device will not be able to use it to connect.
Note 3: Make sure to download the certificate and private key!
Check the Results
We created a Thing named MyThing
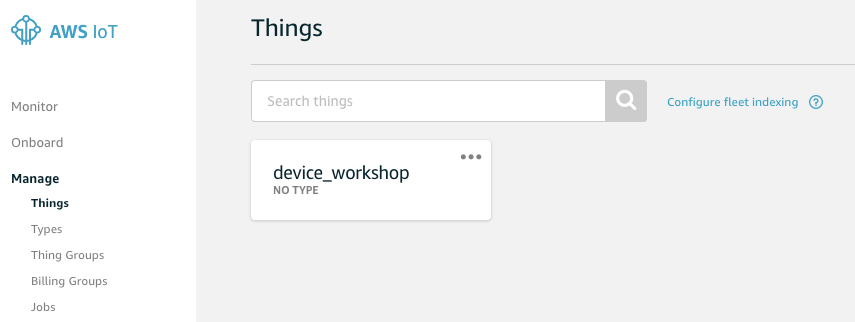
We created a certificate that is attached to MyThing
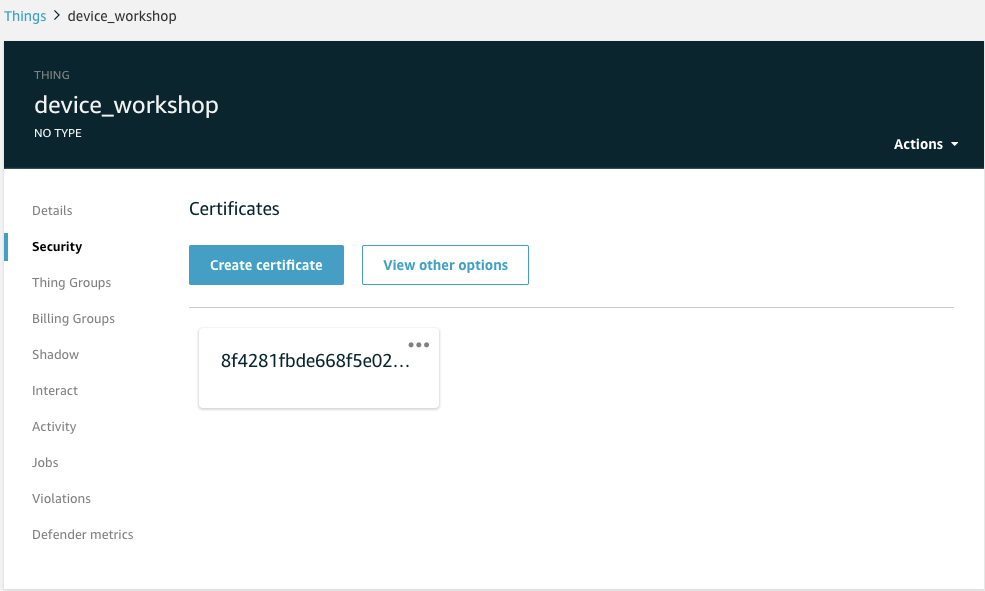
We downloaded MyThing’s certificate with its private and public keys
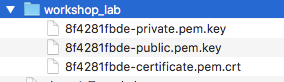
Note 4: Do not lose this zip file, it contains your thing’s private key file which cannot be retrieved again.
ProTip: If you lose the files, no worries, you can always create a new certificate for the thing and attach it. Just make sure to revoke and delete the lost one.
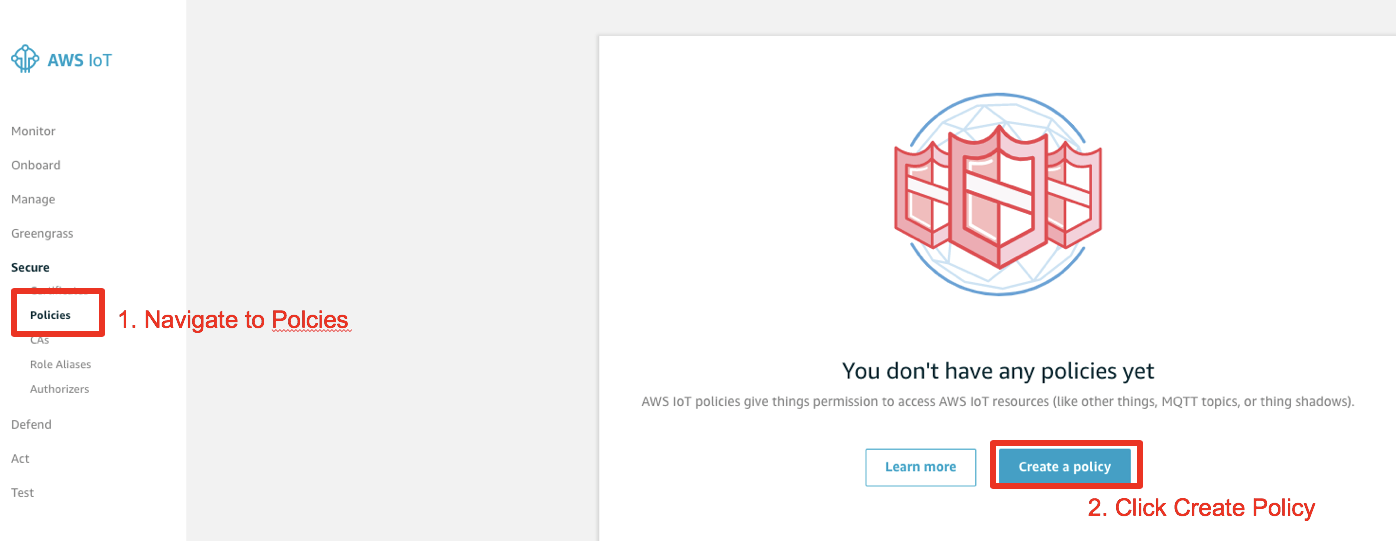
3. Create a Policy and attach it to the certificate
We now need to create an IoT Policy for the certificate we’ve created in the previous step.
Input the policy name of your choice and enter the advanced mode to paste the following policy document
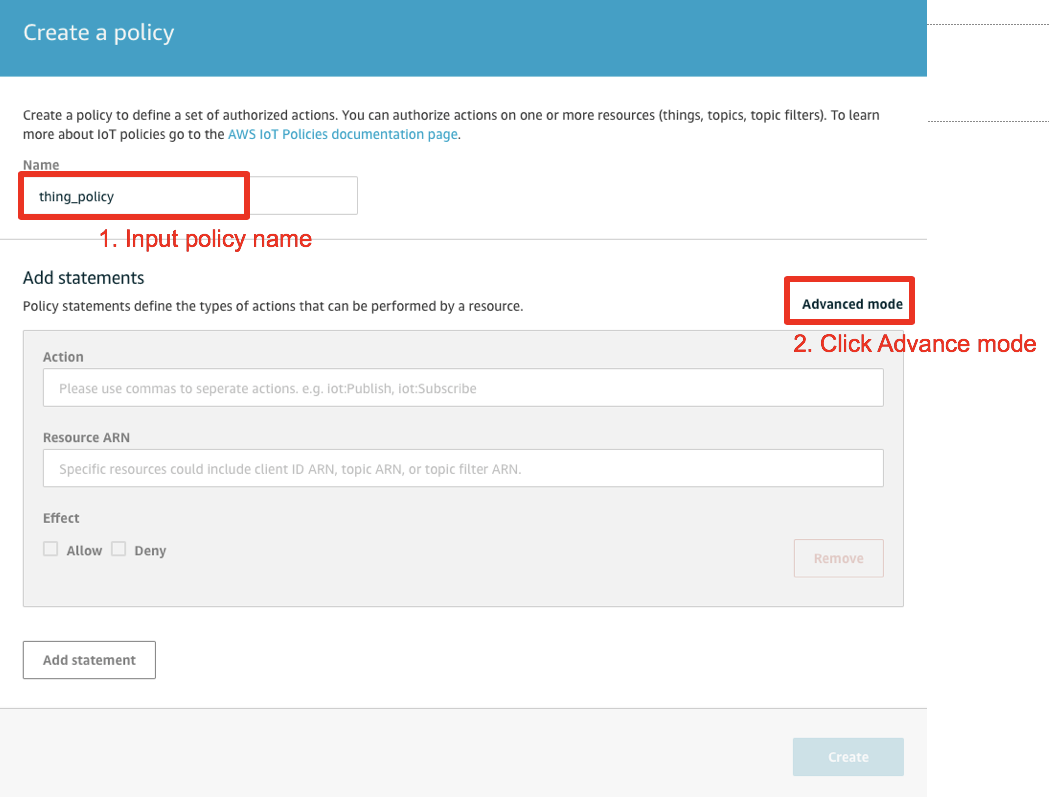
Copy/Paste the following policy document into the input box
{
  "Version": "2012-10-17",
  "Statement": [
    {
      "Effect": "Allow",
      "Action": [
        "iot:Publish",
        "iot:Subscribe",
        "iot:Receive"
      ],
      "Resource": [
        "*"
      ]
    }
  ]
}
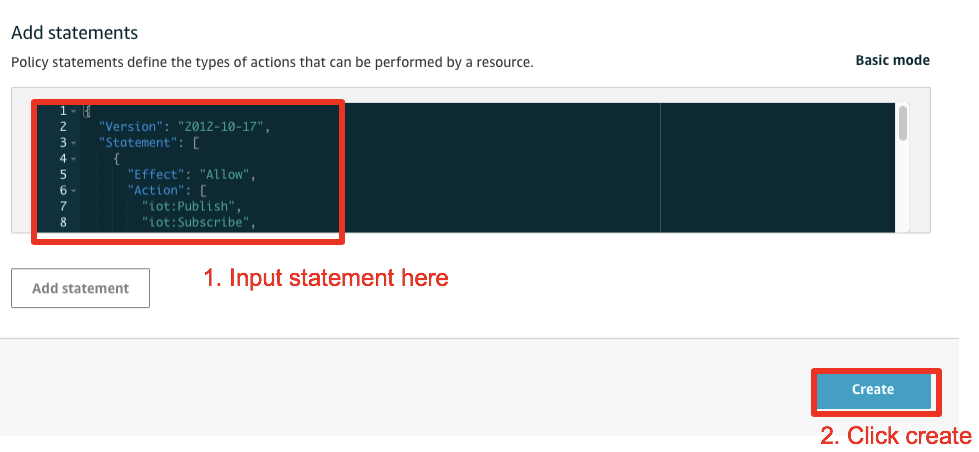
ProTip: The above policy is extremely open. Any entity holding this policy will be able to Publish, Subscribe and Receive data on any AWS IoT Core topic. It is recommended to restrict device policies to the bare minimum that they need.
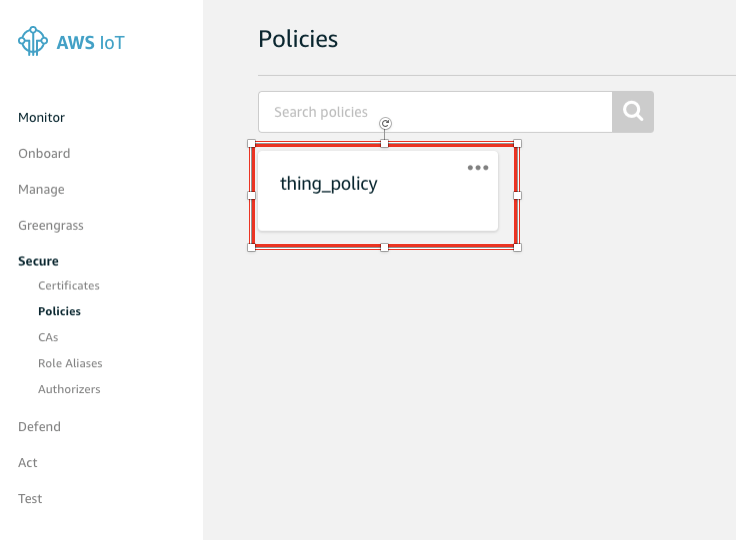
After creation, in the IoT Core console, navigate to “Secure → Policies“. You should see your IoT Policy
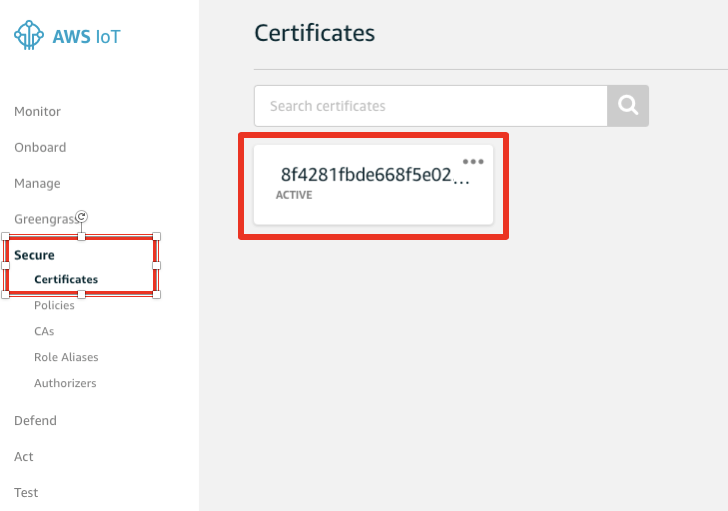
Now, navigate to “Secure → Certificates“ to start attaching the IoT Policy to the certificate
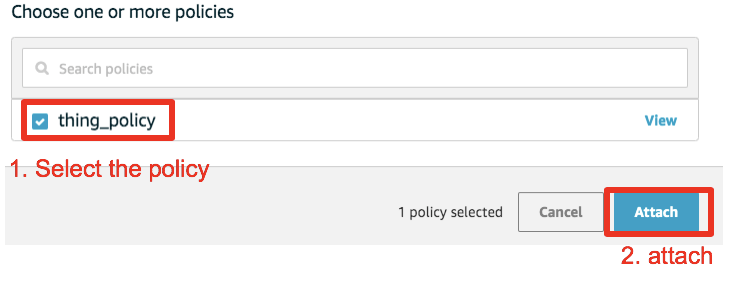
In the certificate page click “Actions → Attach policy”
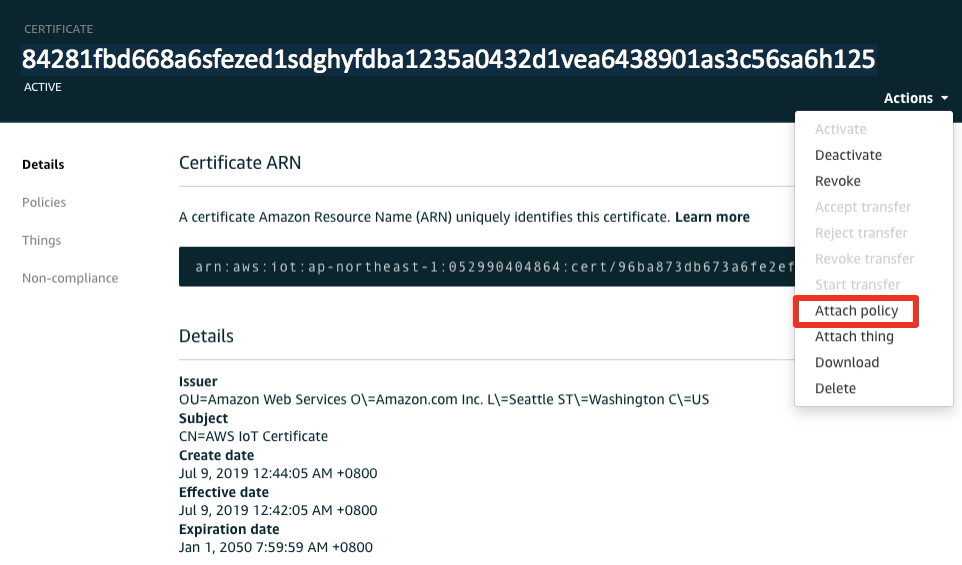
Select your IoT Policy and attach it
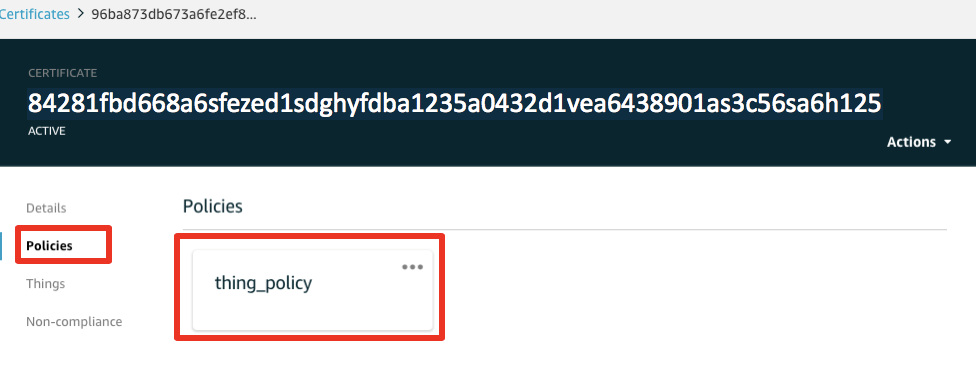
Now, when selecting the policies section of your certificate, your attached policy should be present there
Get the lab code
Now that we have created our Thing (MyThing), its Certificate and IoT Policy, lets get the code.
Clone the repo
In your Cloud9 terminal environment, clone the lab repo:
cd ~/environment
git clone https://github.com/teuteuguy/amazon-freertos-workshop.git --recurse-submodules workshop
Note 5: If you chose to install the labs on your own computer, run the above commands within a terminal. Make sure you replace ~/environment with the folder of your choice
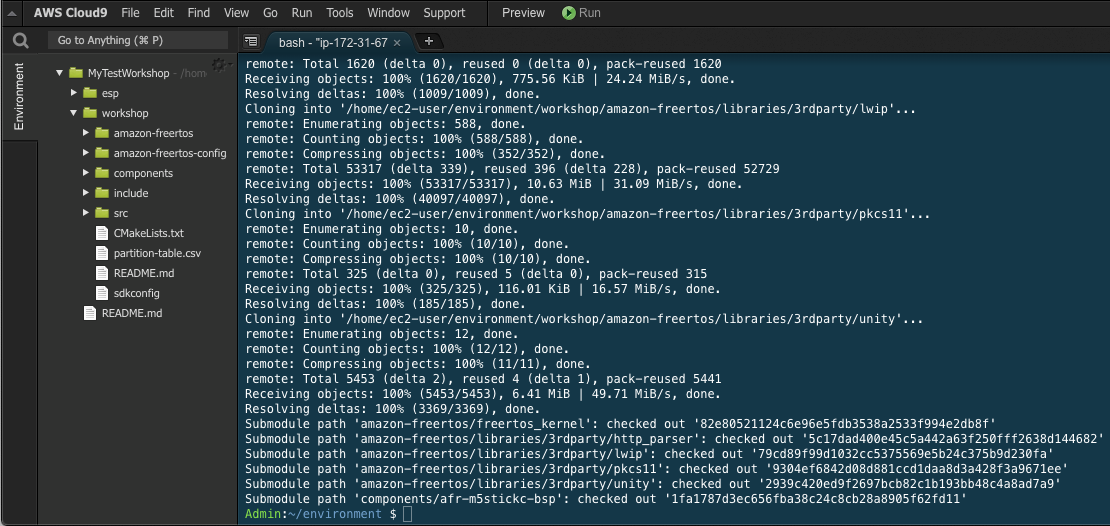
The code repository structure should look like the following in your environment:
workshop
├── amazon-freertos
├── amazon-freertos-config
|  ├── aws_clientcredential.h
|  ├── aws_clientcredential_keys.h
|  ├── aws_demo_config.h
|  ├── aws_iot_network_config.h
|  └── iot_config.h
├── components
├── include
|  ├── lab0_sleep.h
|  ├── lab1_aws_iot_button.h
|  ├── lab2_shadow.h
|  ├── lab_config.h
|  ├── lab_connection.h
|  └── workshop.h
├── src
|  ├── lab0_sleep.c
|  ├── lab1_aws_iot_button.c
|  ├── lab2_shadow.c
|  ├── lab_connection.c
|  ├── main.c
|  └── workshop.c
├── CMakeLists.txt
├── partition-table.csv
├── README.md
└── sdkconfig
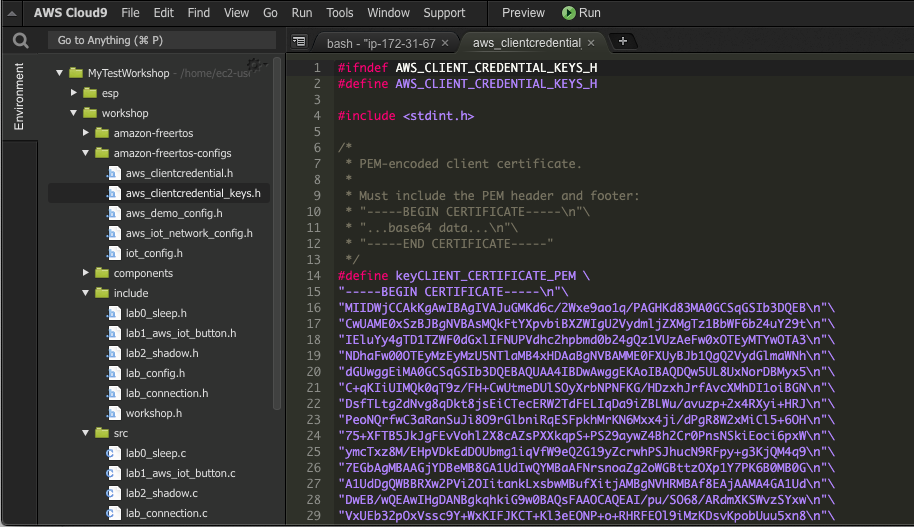
Create the aws_clientcredential_keys.h file
For lab purposes, you can use the following tool to convert your Certificate/Private key into the aws_clientcredential_keys.h that we will include in our project source code.
Navigate to https://yona75.github.io/credformatter/, upload your Certificate and Private key that you downloaded in the previous step and generate an aws_clientcredential_keys.h file.
Copy aws_clientcredential_keys.h to the project
Copy the file to ~/environment/workshop/amazon-freertos-configs directory by dragging it there
Edit aws_clientcredential.h
Open the aws_clientcredential.h file by double-clicking on it. And change/set the following values:
...
#define clientcredentialMQTT_BROKER_ENDPOINT "[YOUR AWS IOT ENDPOINT]"
...
#define clientcredentialIOT_THING_NAME       "MyThing"
...
#define clientcredentialWIFI_SSID            "[WILL BE PROVIDED]"
...
#define clientcredentialWIFI_PASSWORD        "[WILL BE PROVIDED]"
...
#define clientcredentialWIFI_SECURITY        eWiFiSecurityWPA2
...
- You can find your AWS IoT Endpoint by navigating to the IoT Core console and clicking on Settings
- The clientcredentialWIFI_SECURITY #define is without double quotes
- Replace the IoT Thing Name with the one you chose.
Compile the code
cd ~/environment/workshop
cmake -S . -B build -DIDF_SDKCONFIG_DEFAULTS=./sdkconfig -DCMAKE_TOOLCHAIN_FILE=amazon-freertos/tools/cmake/toolchains/xtensa-esp32.cmake -GNinja
If CMAKE build is successful, you should be greeted with the following message:
...
====================Configuration for Amazon FreeRTOS====================
  Version:                 201912.00
  Git version:             201912.00-64-g665fe6544

Target microcontroller:
  vendor:                  Espressif
  board:                   ESP32-DevKitC
  description:             Development board produced by Espressif that comes in two
                           variants either with ESP-WROOM-32 or ESP32-WROVER module
  family:                  ESP32
  data ram size:           520KB
  program memory size:     4MB

Host platform:
  OS:                      Linux-4.14.158-101.185.amzn1.x86_64
  Toolchain:               xtensa-esp32
  Toolchain path:          /home/ec2-user/environment/esp/xtensa-esp32-elf
  CMake generator:         Ninja

Amazon FreeRTOS modules:
  Modules to build:        ble, ble_hal, ble_wifi_provisioning, common, crypto, defender,
                           dev_mode_key_provisioning, freertos_plus_tcp, greengrass,
                           https, kernel, mqtt, ota, pkcs11, pkcs11_implementation,
                           platform, secure_sockets, serializer, shadow, tls, wifi
  Enabled by user:         ble, ble_hal, ble_wifi_provisioning, defender, greengrass,
                           https, mqtt, ota, pkcs11, pkcs11_implementation, platform,
                           secure_sockets, shadow, wifi
  Enabled by dependency:   common, crypto, demo_base, dev_mode_key_provisioning,
                           freertos, freertos_plus_tcp, kernel, ota_http, ota_mqtt,
                           pkcs11_mbedtls, secure_sockets_freertos_plus_tcp, serializer,
                           tls, utils
  3rdparty dependencies:   http_parser, jsmn, mbedtls, pkcs11, tinycbor
  Available demos:         demo_ble, demo_ble_numeric_comparison, demo_defender,
                           demo_greengrass_connectivity, demo_https, demo_mqtt, demo_ota,
                           demo_shadow, demo_tcp, demo_wifi_provisioning
  Available tests:
=========================================================================

-- Configuring done
-- Generating done
-- Build files have been written to: /home/ec2-user/environment/workshop/build
Note 7: If you get errors at this stage, the most common mistake is that your compilation environment has not been setup properly, go back to the setup guide. Check your PATH variable with printenv PATH and make sure the ESP IDF has been properly set.
Now compile the code
cmake --build build
If compilation is successful, you should be greeted with the following message:
...
[29/55] Building C object esp-idf/bootloader_support/CMakeFiles/idf_component_bootloader_support.dir/src/bootloader_clock.c.obj
[30/55] Building C object esp-idf/efuse/CMakeFiles/idf_component_efuse.dir/src/esp_efuse_utility.c.obj
[31/55] Linking C static library esp-idf/efuse/libefuse.a
[32/55] Generating idf_component_efuse.sections_info
[33/55] Building C object esp-idf/micro-ecc/CMakeFiles/idf_component_micro-ecc.dir/micro-ecc/uECC.c.obj
[34/55] Linking C static library esp-idf/micro-ecc/libmicro-ecc.a
[35/55] Building C object esp-idf/bootloader_support/CMakeFiles/idf_component_bootloader_support.dir/src/bootloader_common.c.obj
[36/55] Generating idf_component_micro-ecc.sections_info
[37/55] Building C object esp-idf/bootloader_support/CMakeFiles/idf_component_bootloader_support.dir/src/bootloader_flash_config.c.obj
[38/55] Building C object esp-idf/bootloader_support/CMakeFiles/idf_component_bootloader_support.dir/src/bootloader_random.c.obj
[39/55] Building C object esp-idf/bootloader_support/CMakeFiles/idf_component_bootloader_support.dir/src/bootloader_sha.c.obj
[40/55] Building C object esp-idf/bootloader_support/CMakeFiles/idf_component_bootloader_support.dir/src/esp_image_format.c.obj
[41/55] Building C object esp-idf/bootloader_support/CMakeFiles/idf_component_bootloader_support.dir/src/bootloader_utility.c.obj
[42/55] Building C object esp-idf/bootloader_support/CMakeFiles/idf_component_bootloader_support.dir/src/flash_encrypt.c.obj
[43/55] Building C object esp-idf/bootloader_support/CMakeFiles/idf_component_bootloader_support.dir/src/flash_partitions.c.obj
[44/55] Building C object esp-idf/bootloader_support/CMakeFiles/idf_component_bootloader_support.dir/src/secure_boot_signatures.c.obj
[45/55] Building C object esp-idf/bootloader_support/CMakeFiles/idf_component_bootloader_support.dir/src/flash_qio_mode.c.obj
[46/55] Building C object esp-idf/bootloader_support/CMakeFiles/idf_component_bootloader_support.dir/src/secure_boot.c.obj
[47/55] Building C object esp-idf/main/CMakeFiles/idf_component_main.dir/bootloader_start.c.obj
[48/55] Building C object esp-idf/bootloader_support/CMakeFiles/idf_component_bootloader_support.dir/src/bootloader_init.c.obj
[49/55] Linking C static library esp-idf/main/libmain.a
[50/55] Generating idf_component_main.sections_info
[51/55] Linking C static library esp-idf/bootloader_support/libbootloader_support.a
[52/55] Generating idf_component_bootloader_support.sections_info
[53/55] Building C object CMakeFiles/bootloader.dir/dummy_main_src.c.obj
[54/55] Linking C executable bootloader.elf
[55/55] Generating bootloader.bin
esptool.py v2.8-dev
[842/842] Generating ../afr_workshop.bin
esptool.py v2.8-dev
Download the binary files
Note 8: If you are compiling on your laptop, you can skip this step and go directly to Flash the firmware files
Once compilation is done, download these 3 files to your local computer:
- ~/environment/workshop/build/afr_workshop.bin
- ~/environment/workshop/build/partition-table/partition-table.bin
- ~/environment/workshop/build/bootloader/bootloader.bin
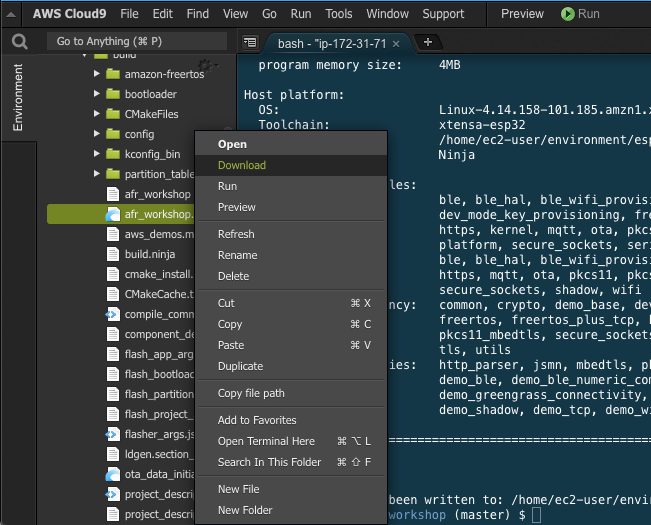
Note 9: the “build” folder is located in ~/environment/workshop/build
Flash the firmware files
For the following part of the lab, we will be connecting to the device, and as such, all commands need to be run on the computer, not the Cloud9 environment.
- Connect your M5StickC to your laptop using the provided USB cable
-
Identify which port the device is connected to
On Windows it will be COMX, on Mac OS typically it enumerated as /dev/cu.usbserial-xxx and on Linux most likely /dev/ttyUSB0
Note 10: If you do not see your device, you may need to install a driver. You can dowload the FTDI VCP Drivers here. Install it. unplug your device and reconnect. You may also need to reboot your machine, after the driver installation.
Note 11: If you are compiling on your laptop, you can skip the below setup and simply execute ESPPORT=[YOUR SERIALPORT] ESPBAUD=1500000 cmake –build build –target flash.
Mac/Linux
Note 12: If you are using the M5StickC, some older models of the device have a know issue when trying to run on Catalina. If you are running into issues on Catalina and M5StickC, please use a paperclip to connect pins G0 to GND of the M5StickC when trying to flash. This should solve the problem on that hardware revision.
- Install esptool.py:
sudo pip install esptool pyserial
- if you compiled the code within the Cloud9 environment, execute the following command from the directory you placed the 3 downloaded files:
cd [THE FOLDER WHERE YOU DOWNLOADED THE 3 FILES IN PREVIOUS STEP]
esptool.py --chip esp32 --port [YOUR /dev/usbserial-xxx] --baud 1500000 --before default_reset --after hard_reset write_flash -z --flash_mode dio --flash_freq 40m --flash_size detect 0x1000 bootloader.bin 0x20000 afr_workshop.bin 0x8000 partition-table.bin
Windows
-
Download the esptool binary from Espressif
-
Drop it in the subfolder that is already in your PATH or add the subfolder you placed esptool to your PATH variable
-
Open a Commnd Prompt and execute the following command (from the directory you placed the 3 downloaded files):
esptool --chip esp32 --port [YOUR COMX] --baud 1500000 --before default_reset --after hard_reset write_flash -z --flash_mode dio --flash_freq 40m --flash_size detect 0x1000 bootloader.bin 0x20000 afr_workshop.bin 0x8000 partition-table.bin
Monitor the flashing process
bash-3.2$ esptool.py --chip esp32 --port /dev/cu.usbserial-29568143B4 --baud 1500000 --before default_reset --after hard_reset write_flash -z --flash_mode dio --flash_freq 40m --flash_size detect 0x1000 bootloader.bin 0x20000 afr_workshop.bin 0x8000 partition-table.bin
esptool.py v2.5.1
Serial port /dev/cu.usbserial-29568143B4
Connecting........__
Chip is ESP32D0WDQ5 (revision 1)
Features: WiFi, BT, Dual Core
MAC: 24:0a:c4:23:de:7c
Uploading stub...
Running stub...
Stub running...
Changing baud rate to 921600
Changed.
Configuring flash size...
Auto-detected Flash size: 4MB
Flash params set to 0x0220
Compressed 21936 bytes to 13046...
Wrote 21936 bytes (13046 compressed) at 0x00001000 in 0.2 seconds (effective 1145.0 kbit/s)...
Hash of data verified.
Compressed 628432 bytes to 398564...
Wrote 628432 bytes (398564 compressed) at 0x00020000 in 5.9 seconds (effective 854.5 kbit/s)...
Hash of data verified.
Compressed 3072 bytes to 119...
Wrote 3072 bytes (119 compressed) at 0x00008000 in 0.0 seconds (effective 3255.9 kbit/s)...
Hash of data verified.

Leaving...
Hard resetting via RTS pin...
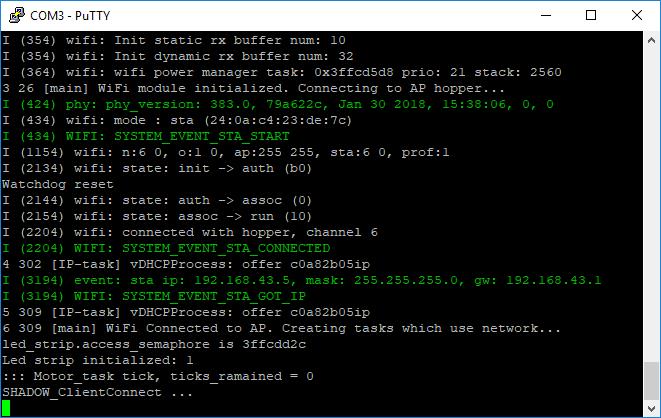
Monitor code execution through the serial console
Windows
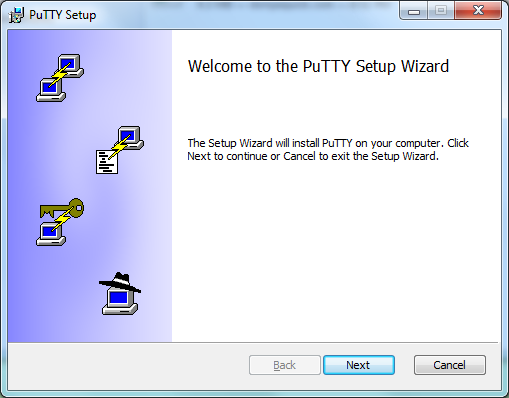
- Install PuTTY
You can download putty from http://www.putty.org/ or http://www.chiark.greenend.org.uk/~sgtatham/putty/download.html
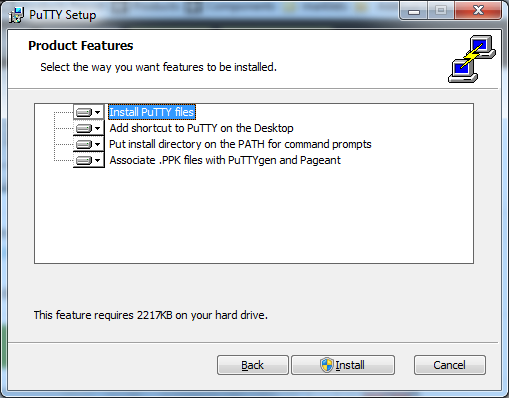
- Run Installation wizard
- Check all options
- Setup the port and speed (Port COM3 and 115200 in our case)
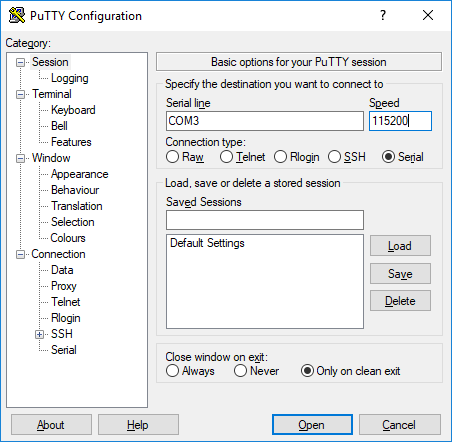
- Open console access to ESP32
Mac/Linux
Use screen command to see the ESP32 console:
screen /dev/[YOUR SERIAL PORT] 115200 -L
Note 13: In order to exit screen press Ctrl + A and then K
Done
You are done with Lab 0. If we recap, you’ve:
- Created a Thing, its Certificate and IoT Policy
- Downloaded and setup the Amazon FreeRTOS demo code for the labs
- Compiled and Flashed the code on your device